Fesler parts are built for builders. That sentence sounds like marketing, but it is the most important thing to understand before you place your order.
Whether you are ordering flush mount glass for your first generation Camaro, a full fiberglass interior kit for your Squarebody, billet door handles for a C10, or any combination of the three, you are buying components that are precision engineered, hand built in Phoenix, Arizona, and finished on your car. They are not Amazon parts. They are not designed to unbox, click in, and walk away from. They are the foundation of a serious build.
This guide is for the first time builder, the DIY customer ordering their first set of Fesler parts, and anyone who wants to know what a successful install actually looks like before the crate shows up. Read it once, then keep it open while you plan.
In this guide
- What you are actually ordering
- The three product categories and how each one installs
- What "designed to fit" actually means on a classic car
- Reproduction bodies need extra attention
- The build sequence that makes everything work
- Test fit before you finish
- The 60 day test fit policy and why it matters
- When to call us, and what to call about
- How to reach us
- The bottom line
What you are actually ordering
Every part Fesler manufactures goes through the same loop. We prototype, mold, test fit on real vehicles, manufacture, and test fit again before the part is approved for production. Our flush mount glass is built in North America with our partner Pilkington, an OEM grade glass manufacturer trusted by major automakers. Our fiberglass panels are hand laid in Phoenix and inspected before they ship. Our billet hardware is CNC machined from 6061-T6 aluminum and assembled in house.
That process is what makes Fesler parts fit cleanly on a properly prepared classic car. It is also what separates them from the imported kits that show up oversized and expect you to sand them to size. We do not work that way. Our parts are sized correctly when they leave the shop.
Here is what that means for you as the builder. The parts are engineered to fit. The parts are not engineered to install themselves. Those are two different things, and the rest of this guide explains why that matters.
The three product categories and how each one installs
Flush mount glass
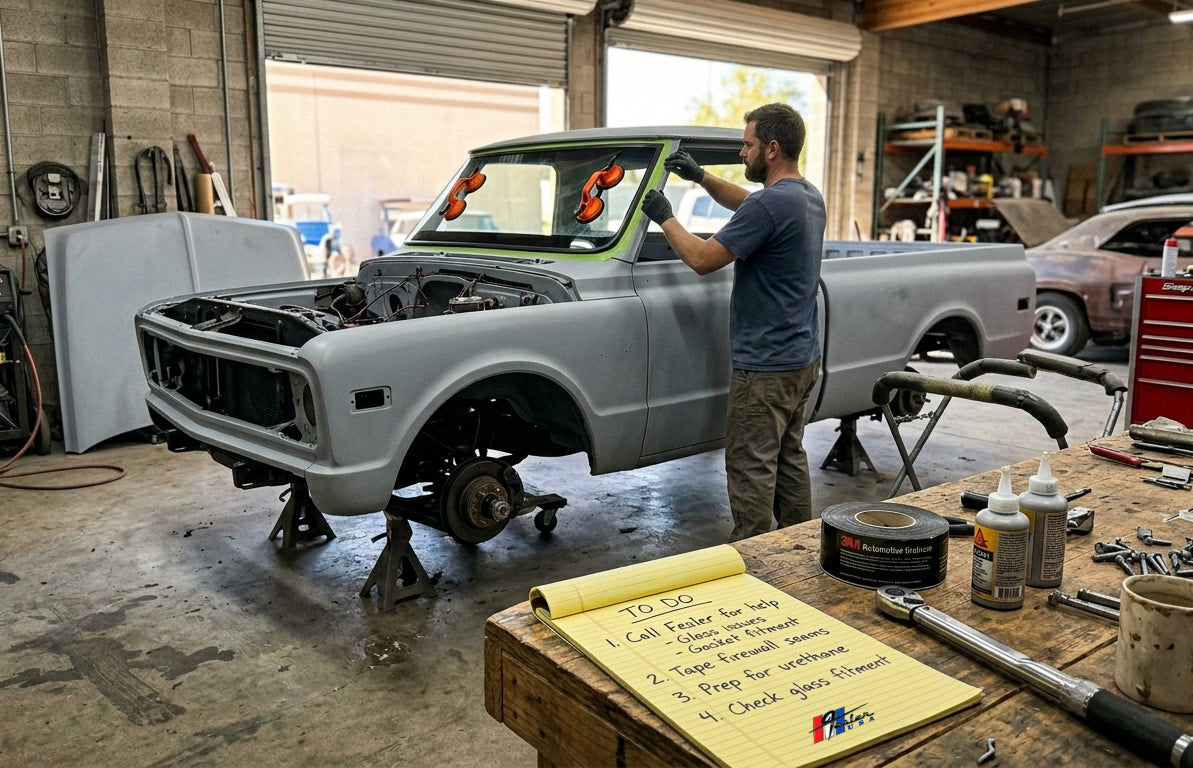
Fesler flush mount glass is a complete kit: a DOT approved laminated front windshield, a tempered rear glass, OE style green hue, FRIT band around the perimeter, and the glass is purpose sized to bond directly into the factory opening. There is no rubber gasket. There is no chrome trim. The glass sits flush with the body, the same way it does on a 2025 production vehicle.
What is not in the crate: urethane, primer, clips, mounting hardware, and labor. Those are the responsibility of you or your installer. We strongly recommend professional installation by a certified auto glass technician using automotive urethane and proper primers.
Adhesive matters. Butyl tape is not an acceptable adhesive for flush glass. Butyl holds about 60 psi. Urethane systems hold 600 psi or more. Your windshield is a structural safety component. Use the right adhesive.
The glass does not require sanding to fit. It does not require trimming or shaping. On a properly prepared factory body, it bonds within the factory opening with a tight, uniform reveal. On a reproduction body, or on a car with prior collision repair, rust repair, or non OE bodywork around the glass aperture, the body side may need to be addressed. More on that in a minute.
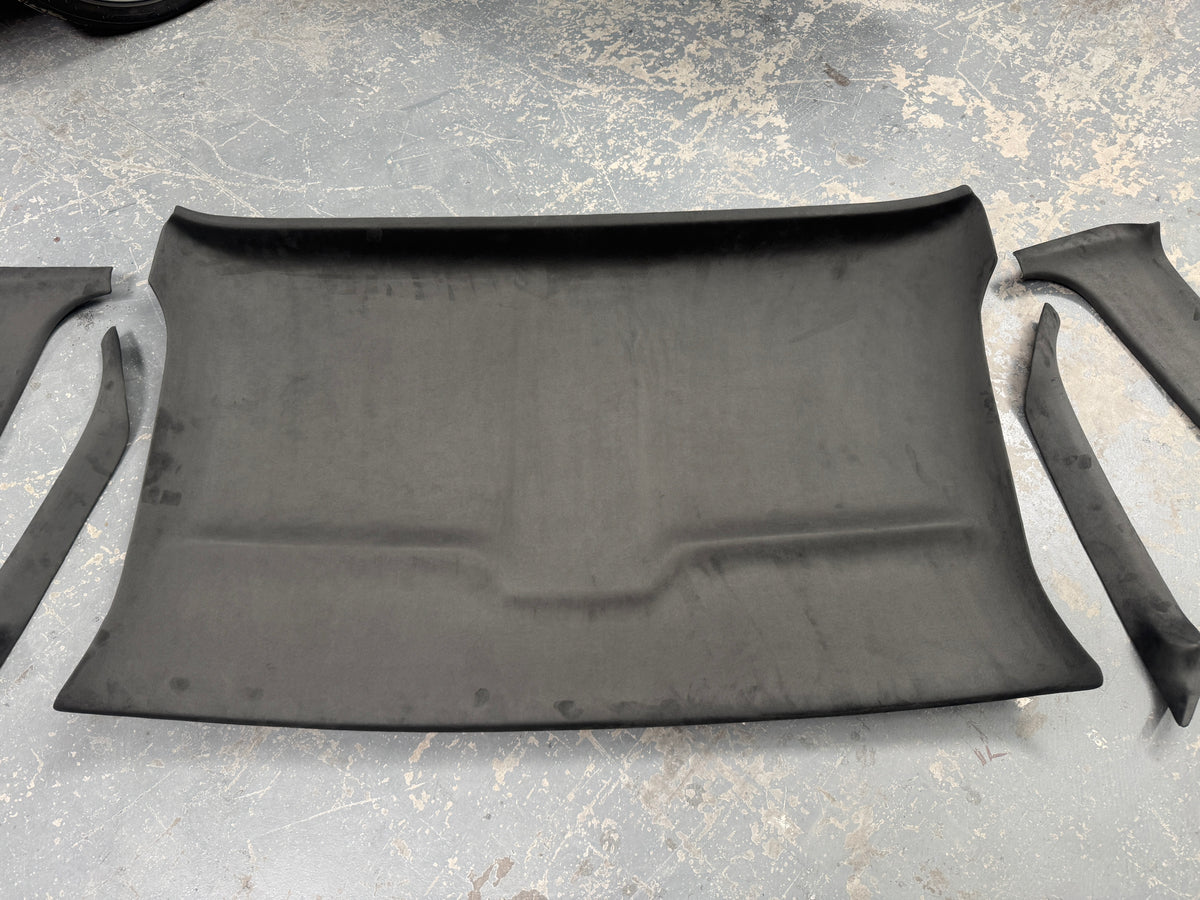
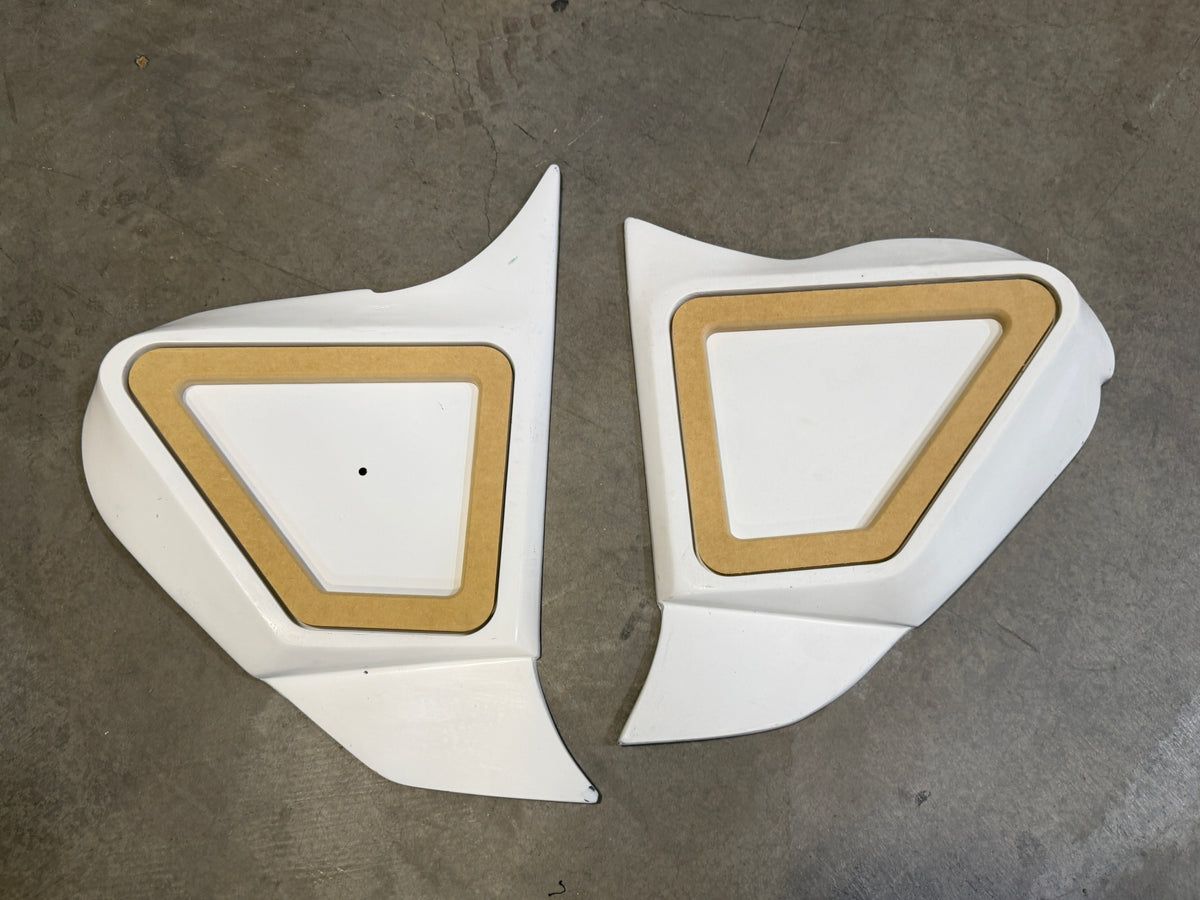
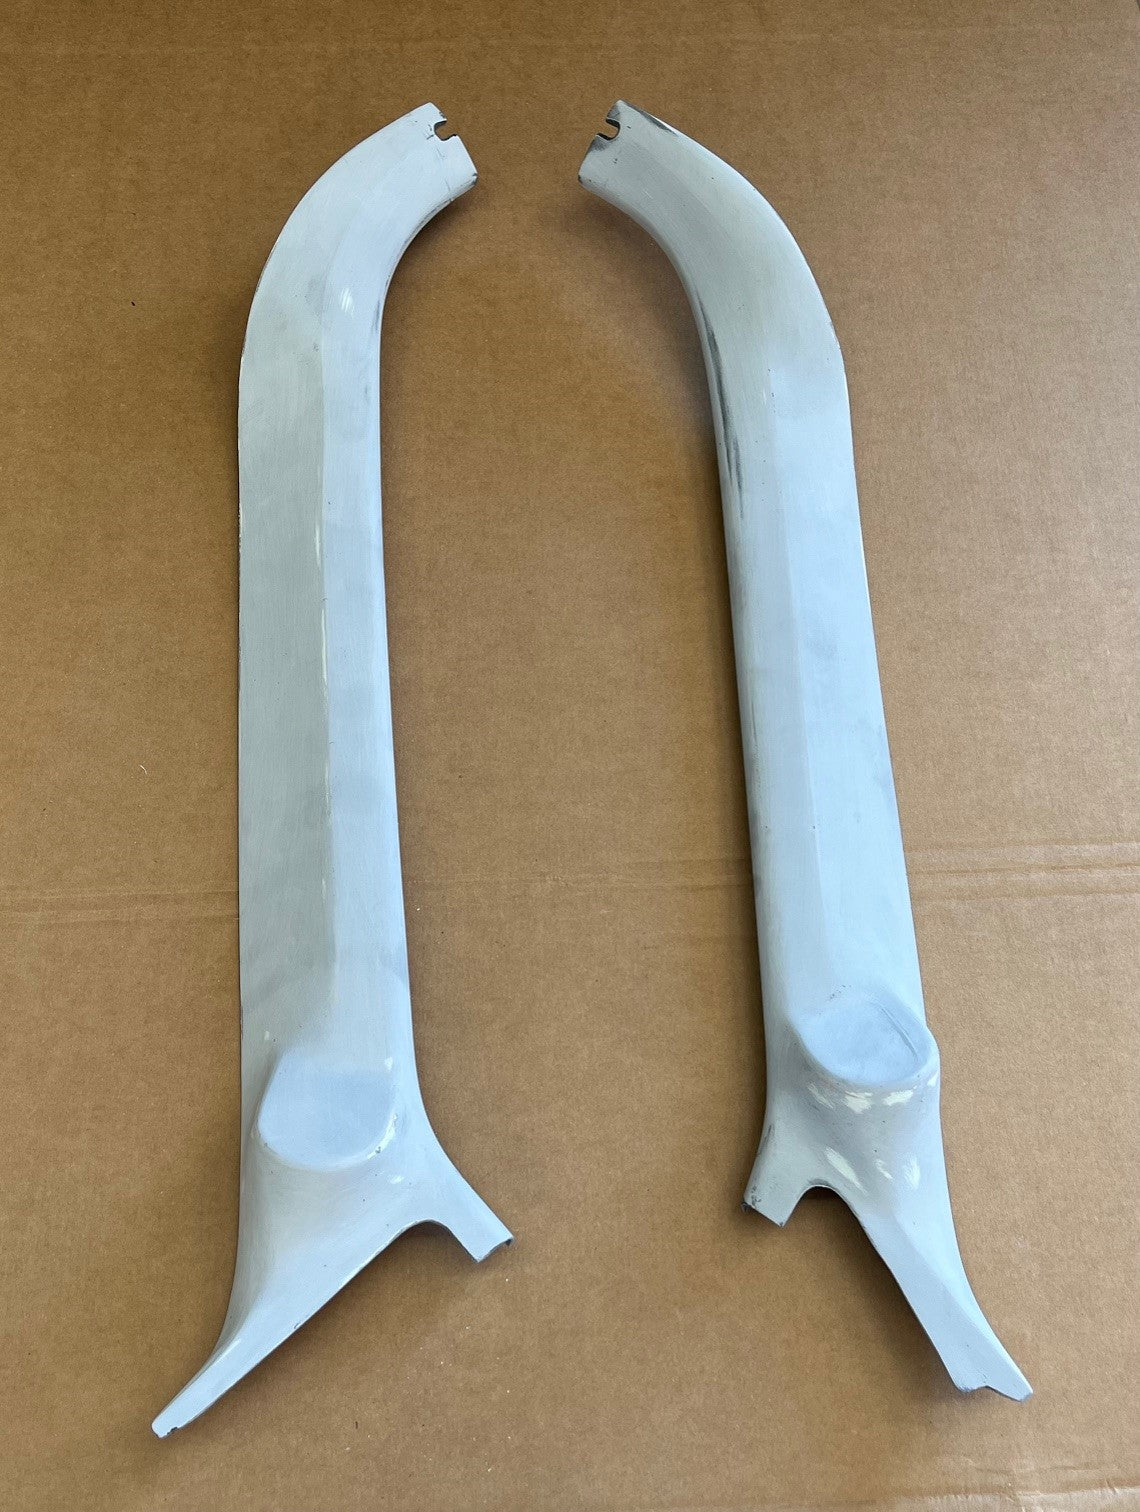
Fiberglass interior parts
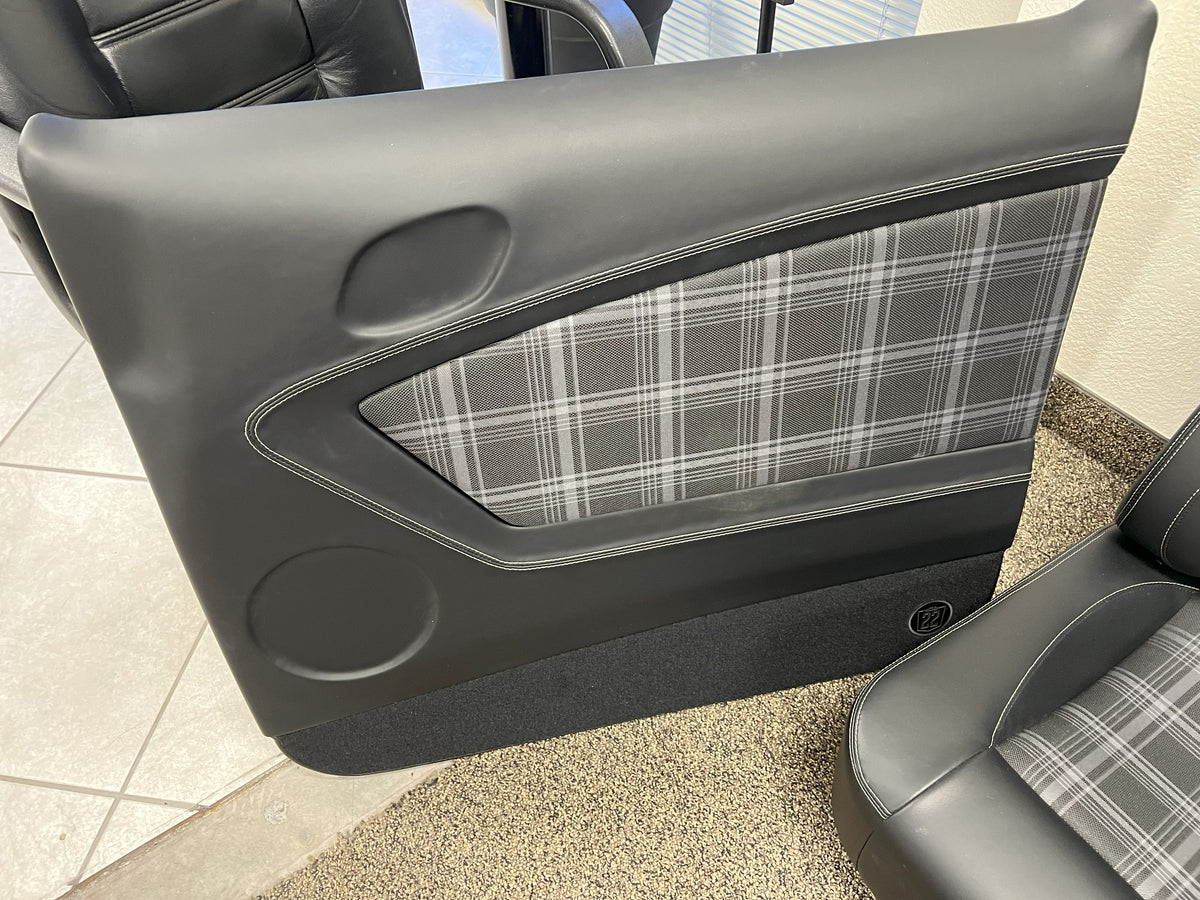
Door panels, dash overlays, dash inserts, kick panels, headliners, A pillars, package trays, consoles, and full interior kits. These are hand laid fiberglass parts that ship in raw gel coat. You are responsible for upholstering or painting them to match your interior, or you can order them pre wrapped from our in house upholstery shop.
Fesler interior parts are engineered around Fesler hardware. The door panels are designed to work with our billet door handles, our power window kits, our switch kits, and 6.5 inch Morel speakers. They mount to the factory mounting points on a factory shell. Skill level on most pieces ranges from intermediate to intermediate advanced. Most installs take light trimming and test fitting to dial in. Some take more, depending on the history of your specific car.
Plan your install sequence before you start. The recommended order on a full interior kit is dash overlay, headliner, door panels, kick panels, rear trim panel. Do not send a single piece to upholstery until you have test fit it on the car.
Billet hardware
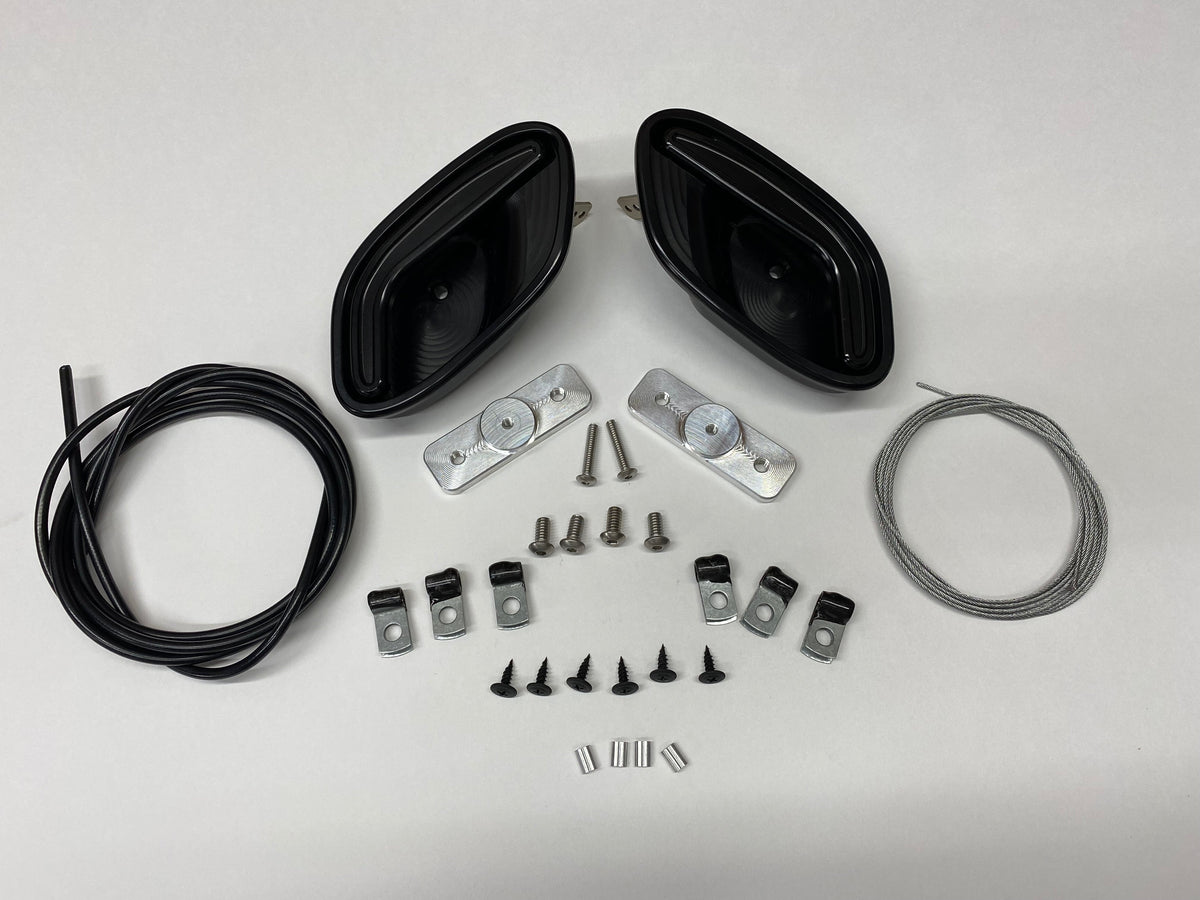
Door handles, armrests, arm pulls, dash inserts, and power window components. CNC machined from 6061-T6 aluminum, available in raw or black, with custom finishes available on request.
Our billet hardware is engineered around our fiberglass panels for no modification fitment when both are used together. If you are running stock or non Fesler panels, verify panel thickness, mounting surface, fastener clearance, and latch travel before final install. The hardware is not the issue in those cases. The interface between the hardware and the panel it is mounting to is.
What "designed to fit" actually means on a classic car
This is the part that catches most first time builders by surprise, so read it twice.
Every part we make is engineered to fit a factory original body that has been properly prepared, gapped, aligned, and sitting on the ground with fenders and doors installed. That is the baseline.
Your car is not a baseline. Your car is between forty and seventy years old. Somewhere in its history, it has been through paint shops, body shops, weather, accidents, parts swaps, prior restorations, patch panels, and probably at least one previous owner with a sawzall and an opinion. We do not know what has been done to your specific shell. You may not even know everything that has been done to your specific shell.
That history shows up at install time. Prior bodywork can shift mounting points by an eighth of an inch. Rust repair can change a door opening by a hair. A patch panel that was beautiful work in 1998 can still throw off the relationship between a dash overlay and a windshield in 2026. Door skin replacement can affect where a door panel seats. None of that is a flaw in your car or in our part. It is the reality of building on a classic.
This is why every Fesler product description tells you to test fit. It is why we recommend professional installers who know how to read a body and adjust on the car. And it is why we always say: every Camaro, every C10, every Nova, every Squarebody, every Charger, every Bronco has its own history. Final fit is finished on the car.
Reproduction bodies need extra attention
Building on a Dynacorn or other reproduction body? Call us before you order.
Reproduction bodies are excellent foundations, but they are not the same as factory original metal in every dimension that matters for glass and interior fitment. Substantial metal work may be required around the glass aperture to bring the opening to the proper geometry for flush glass. Fiberglass interior panels can also need additional trimming to seat correctly on a reproduction body.
This is a planning conversation, not a problem. We have customers running Fesler glass and interiors on Dynacorn shells in show winning builds. They got there by talking to us up front and planning the metal work into the build, not by discovering it on install day.
The build sequence that makes everything work
The single biggest reason a Fesler install goes sideways is that something was done out of order. Glass installed before the body was finished. Door panels test fit before the doors were hung and gapped. Upholstery completed on a panel before it was test fit on the car. Wiring run after the panels were already final.
This is the sequence that works:
- Body and paint. Metal finished, gapped, aligned, sitting on the ground with fenders and doors installed.
- Glass. Test fit during the bodywork stage. Bond in after paint, before interior work begins. Flush glass is bonded with urethane and needs full cure time.
- Wiring and HVAC. Route the harness, plan switch locations, and package the HVAC before any panels go in.
- Sound deadening and insulation.
- Headliner, A pillars, and upper interior panels. Start at the top and work down.
- Dash overlay and gauges.
- Door panels, kick panels, and accessories. Install power window motors and run speaker wires before mounting the door panel.
- Carpet and seats.
If you are running flush glass and interior parts on the same build, this sequence is not optional. Skipping a step or doing one out of order is the single fastest way to create rework, and rework is expensive in time, money, and patience.
Test fit before you finish
Three words to live by on a Fesler interior install. Test fit before you finish.
That means: every fiberglass piece gets test fit on the car before it goes to the upholsterer. Every billet handle gets test mounted before final torque. Every panel gets checked against the car it is going on, not against the picture in your head.
Most installs need only minor adjustment at this stage. A 1969 Camaro dash insert is typically about an hour of trimming and test fitting on a factory shell. Hardtop door panels test fit and install in about an hour with minimal mock up. A C10 dash overlay drops over the factory dash and bolts on without modification on a factory OE shell.
Some installs need more. Convertible rear panels add about an hour for trimming to clear top mechanisms. Trucks with prior interior or dash modifications can need extra trimming. Cars with prior body or door work can need careful attention to rear panel alignment. Headliners ship extended for flush glass builds and need about a half inch trimmed front and rear if you are running stock glass. Fiberglass console shifter holes are intentionally left uncut so you can measure and cut for your specific shifter.
None of this is a problem. All of it is normal builder work, and all of it is expected. The mistake is sending a piece to upholstery without test fitting it first, then discovering at final install that something needs to be trimmed and the upholstery has to come off to do it.
The 60 day test fit policy and why it matters
Fesler glass carries a 30 day warranty from purchase and a 60 day test fit window from receipt. You have 60 days from delivery to test fit your glass and identify any vehicle side issues that need to be addressed. After 60 days, warranty and replacement are not available, and the glass is non returnable.
This is not paperwork for the sake of paperwork. It is a structural part of how we support builds. If you open the crate, set the glass aside, and finish six months of body and paint work before you ever try the glass on the car, and then a fitment issue surfaces, we have lost the ability to help you in the way we can help when the test fit happens early. Test fit during the bodywork stage. That is when problems are easy to address. Once paint is on, the cost of fixing anything goes up dramatically.
Fiberglass interior parts follow the same logic. Test fit on the car before you commit to upholstery. Once it is wrapped, every adjustment costs you twice.
When to call us, and what to call about
The most successful Fesler builds we see have one thing in common. The builder called us before they installed anything. Not after a problem. Before.
Call before you order if any of these apply
- You are building on a Dynacorn or other reproduction body
- You are building a convertible, a Suburban, a Blazer, a crew cab, or any non standard cab configuration
- Your car has a known history of significant collision repair, rust repair, or major bodywork
- You have a hard deadline for a show, an auction, or a delivery date
- You are unsure about year fitment, vent windows, wing windows, or door configuration
- You are mixing Fesler parts with non Fesler panels or hardware
- You are running manual windows on door panels engineered for power
Call before you install if any of these apply
- The glass does not seat the way you expect during test fit
- A fiberglass piece needs more trimming than feels normal
- You are not sure about adhesive selection, primer, or cure time
- Your installer has a question about preparation
- Anything looks different from the install guide on the website
We would rather answer a fitment question on the phone than deal with a mismatch after the fact. That is not a polite saying. It is genuinely how we run support. The fastest path to a clean install is a builder who calls us during the build, not after.
How to reach us
Phone or text: 480-748-2000
Hours: Monday through Thursday, 8am to 5pm Arizona time
Email: info@shopfesler.com
Shop: 3831 E La Salle St, Phoenix, AZ 85040
You will reach a real person at Fesler. We have been hand building parts for classic American cars in Phoenix since 1990, and we support every product we sell.
The bottom line
Fesler glass, fiberglass interiors, and billet hardware are not Amazon parts. They are precision components engineered for builders, designed to install cleanly on properly prepared classic cars, and finished on the vehicle they are going into. The fit, the finish, and the look are worth the work. The work is real.
If you are new to this, take it seriously. Plan your sequence. Test fit before you finish. Use the right installer for the right job. Call us early and call us often. Every successful Fesler build is a partnership between a builder and our shop, and we are ready to be your half of that partnership the day you place your order.
You are not alone in your build.
Contact us. We are here to help.
480-748-2000


Leave a comment
This site is protected by hCaptcha and the hCaptcha Privacy Policy and Terms of Service apply.